Photography
6×7
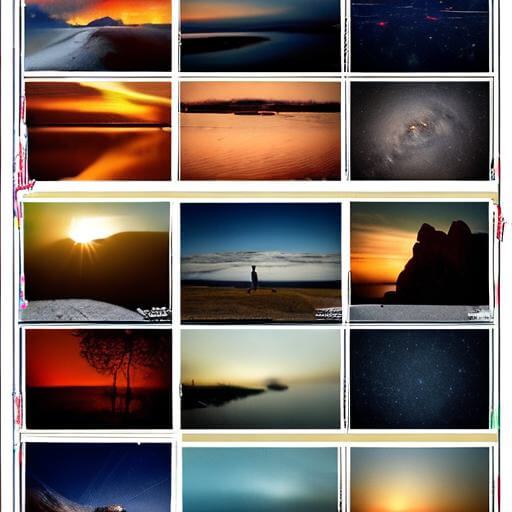
Introduction
Welcome to the captivating world of “6×7,” a title that beckons us into the realm of medium format photography. In this article, we will embark on a journey through the intricacies of this unique photographic format, exploring its history, significance, and the artistry it offers to photographers.
Evolution of Photography:
To understand the essence of “6×7,” we first delve into the broader evolution of photography. From the early daguerreotypes to the modern digital era, photography has undergone remarkable transformations. Each phase brought new technologies, techniques, and formats, each contributing to the rich tapestry of visual storytelling.
Medium Format Photography Unveiled:
Amidst this evolution, medium-format photography emerges as a distinct and intriguing chapter. The “6×7” format, in particular, represents a fascinating intersection of tradition and innovation. Unlike standard 35mm film, medium format film offers a larger canvas, providing photographers with increased detail, dynamic range, and an unmistakable aesthetic appeal.
Significance of “6×7”:
The title “6×7” itself holds a certain mystique. It refers to the dimensions of the photographic frame, indicating a format that is 6 centimeters in height and 7 centimeters in width. This seemingly modest numeric designation conceals a world of possibilities, inviting photographers to explore compositions and perspectives beyond the ordinary.
Overview of What’s to Come:
In this study of “6×7,” we will learn about the function of film, the play of light, the attraction of portraiture, the complexities of the process of development, and the technical subtleties that turn this format into a work of art. By the time this adventure is over, you will have a firm understanding of medium format photography and be motivated to grab a 6×7 camera and start taking your pictures.
Understanding Medium Format Photography
Medium format photography stands as a testament to the pursuit of excellence in image quality, providing photographers with a canvas larger than the standard 35mm film. In this section, we delve into the nuances of medium format photography, with a focus on the “6×7” format.
Exploring the “6×7” Format:
The frame measurements of 6 centimeters in height and 7 centimeters in breadth define the “6×7” format. Compared to lesser formats like 35mm, this bigger frame size creates a unique visual impression. The 6×7 size is popular among photographers because it can capture more information, has a wider dynamic range, and has a distinctive aspect ratio that works well with a variety of subjects.
Medium Format Cameras:
Medium format cameras designed for the “6×7” format come in various configurations, including both film and digital options. These cameras are equipped with larger image sensors or film frames, allowing for the creation of high-resolution images with unparalleled clarity. Popular among professional photographers and enthusiasts alike, medium format cameras offer a range of features to cater to diverse photographic needs.
Advantages of Medium Format:
One of the primary advantages of the “6×7” format is the increased resolution and detail it offers. This is particularly advantageous in scenarios where capturing intricate textures, subtle gradients, and fine details is crucial. Additionally, the larger negative or sensor size contributes to a shallower depth of field, allowing for creative control over focus and background blur.
Challenges and Considerations:
Although medium format photography has many advantages, there are drawbacks as well, such as equipment weight and size. Because medium format cameras are sometimes larger than their 35mm equivalents, composition requires more care and planning. Photographers must consider their creative and professional objectives when evaluating the investment in equipment and film, as the former might have larger costs.
Historical Significance:
The Pentax 6×7 and other iconic cameras have played a significant role in the adoption of this particular aspect ratio. The “6×7” format has its origins in the historical use of medium format film. Gaining a better understanding of the past helps one to appreciate medium-format photography’s lasting legacy.
The groundwork for our investigation of “6×7” has been set up in this part, where we have examined the format’s size, equipment, benefits, drawbacks, and historical importance. We will continue to explore the elements that contribute to “6×7” being a unique and beloved visual storytelling medium as we go.
The Role of Film in 6×7 Photography
The film, with its tangible and nostalgic qualities, plays a pivotal role in the “6×7” format, contributing to the distinctive charm and aesthetic appeal of medium format photography. In this section, we explore the nuances of using film in the context of “6×7” and the unique qualities it imparts to the photographic process.
Embracing Analog:
The use of analog film in “6×7” photography is one of its distinguishing features. Film records a picture physically by capturing light in a chemical emulsion, in contrast to digital sensors. Because photographers load film, set exposure, and develop the negatives by hand, the analog process lends an air of skill and creativity.
Advantages of Film in Medium Format:
Film in the “6×7” format offers several advantages. The larger negative size enhances the overall image quality, allowing for more detail and nuance in the final print. The film’s inherent dynamic range suits the medium format well, capturing a broader spectrum of tones and contributing to the distinct look associated with medium format photography.
Characteristics of Medium Format Film:
Compared to smaller sizes, medium format film for “6×7” cameras is usually bigger and gives a better resolution. Commonly used film types include 120 and 220-roll films. Choosing the right film stock is also very important in creating the final image. Photographers have a variety of alternatives to choose from, and each one imparts a distinct color interpretation, contrast, and grain structure.
Creative Expression through Film:
The film allows photographers to experiment with various techniques to achieve specific visual effects. From manipulating exposure for intentional overexposure or underexposure to choosing different film stocks for varied color palettes, the use of film in “6×7” photography provides a broad canvas for creative expression.
Challenges of Film Photography:
While film brings its own set of advantages, it also presents challenges. Film photographers must carefully manage the limited number of exposures on a roll, making each frame count. Additionally, the process of developing film requires skill and precision, demanding a commitment to mastering the craft.
Digital Alternatives in 6×7 Photography:
While film remains a beloved medium for “6×7” photography, digital alternatives have gained prominence. Digital medium format cameras offer the convenience of immediate feedback, flexibility in post-processing, and high-resolution sensors, bridging the gap between analog and digital workflows.
Capturing Light in 6×7 Photography
Light, the fundamental essence of photography, takes on a special significance in the context of “6×7” photography. In this section, we explore the interplay of light and the techniques employed to capture its nuances, enhancing the visual storytelling potential of the medium format.
Importance of Light in Photography:
Light serves as the brushstroke of a photographer, shaping the mood, tone, and atmosphere of an image. In “6×7” photography, where the larger frame size allows for intricate details, the role of light becomes even more pronounced. Photographers must master the art of manipulating light to convey their intended narrative.
Natural Light and 6×7 Format:
The “6×7” format excels in capturing the subtleties of natural light. The larger negative size allows for greater detail in highlights and shadows, enabling photographers to leverage the dynamic range of the medium. Outdoor settings, with their ever-changing natural light, present a canvas for creating compelling compositions in medium format.
Controlled Lighting Environments:
In studio settings, the “6×7” format provides photographers with the space to create controlled lighting environments. This control is particularly advantageous in portraiture and still-life photography, where precise lighting setups can highlight specific features and textures, enhancing the overall visual impact of the image.
Techniques for Light Manipulation:
Photographers often employ various techniques to manipulate light in “6×7” photography. This may include the use of reflectors, diffusers, and artificial lighting sources to sculpt and shape the illumination. Understanding the direction, intensity, and quality of light allows photographers to evoke specific emotions and convey a sense of depth in their images.
Balancing Highlights and Shadows:
Achieving a balance between highlights and shadows is crucial in “6×7” photography. The larger negative size allows for a nuanced approach to tonal range, enabling photographers to preserve details in both bright and dark areas. This balance contributes to the overall visual richness and depth of the image.
The Art of Portraiture in 6×7 Format
The “6×7” format provides new options and proportions for the age-old art genre of portraiture. In this section, we explore the special qualities that make the “6×7” size an excellent canvas for taking captivating and expressive portraits, delving into the fascination with portraiture in medium format photography.
Distinctive Look of 6×7 Portraits:
“6×7” size portraits have a particular aesthetic that is defined by rich details, shallow depth of focus, and an unusual aspect ratio. Greater facial feature definition and a beautiful, smooth bokeh that separates the subject from the backdrop are made possible by the bigger negative size, which also results in a visually striking picture.
Medium Format Cameras for Portraiture:
Photographers often turn to specific medium format cameras designed for portraiture within the “6×7” format. These cameras are equipped with lenses that excel in rendering skin tones, capturing fine details, and providing a pleasing compression that enhances the overall aesthetic of portraits.
Emotional Impact of Medium Format Portraits:
The “6×7” format works well for expressing a subject’s subtle emotional changes. Viewers might be deeply moved by medium-format portraits due to their expressive eyes, nuanced movements, or the way light plays on the skin. Photographers can portray a feeling of closeness and connection with their subjects because of the wider canvas.
Challenges and Rewards in 6×7 Portraiture:
While portraiture in the “6×7” format offers numerous rewards, it also presents challenges. The larger and bulkier nature of medium format cameras demands a more deliberate and careful approach to posing and framing. However, the resulting portraits, with their unparalleled detail and aesthetic quality, make overcoming these challenges worthwhile for photographers passionate about the art of portraiture.
Wet and Dry Processes:
A medium-format film can undergo both wet and dry processing methods. Wet processing involves the use of liquid chemicals in a series of baths, while dry processing relies on chemicals incorporated into the film itself. Each method offers its own set of advantages, and photographers often choose based on personal preference and desired outcomes.
Handling Film Varieties:
The film itself plays a crucial role in the development process. Various film stocks, each with its unique characteristics, respond differently to the development chemicals. Photographers in the “6×7” format may experiment with different films to achieve specific looks, tones, and grain structures in their final images.
Preserving the Craft of Film Development:
Film development stands as a technique that retains the spirit of conventional photography in an era dominated by digital technologies. The “6×7” format of film photography has a certain charm that comes from the hands-on aspect of the process, the excitement of watching the picture appear in the developer, and the concrete outcome of a physical negative.
Technical Insights: How to Master 6×7 Photography
As we navigate the realm of “6×7” photography, understanding the technical aspects becomes paramount for achieving mastery in this unique medium format. In this section, we explore the intricacies of shooting in the “6×7” format, providing insights and tips for photographers looking to elevate their skills and capture exceptional images.
Choosing the Right Equipment:
Choosing the right camera and lens combination is essential to become proficient in “6×7” photography. This format’s medium format cameras are frequently fitted with excellent lenses that provide clarity, sharpness, and the capacity to capture minute details. Achieving the best outcomes requires first knowing what the equipment is capable of.
Understanding Exposure in Medium Format:
Exposure considerations take on added importance in the “6×7” format due to the larger negative size. Photographers must be adept at metering light accurately and adjusting exposure settings to capture the full dynamic range of the scene. Balancing aperture, shutter speed, and ISO becomes a delicate dance in pursuit of the perfect exposure.
Framing and Composition:
The “6×7” format’s large frame offers additional compositional and framing options. Using the broader canvas, photographers should pay attention to how objects are positioned within the frame to produce visually appealing compositions. Trying out different compositions makes each picture more capable of presenting a tale.
Depth of Field Control:
With the “6×7” format’s unique depth of field control, photographers may focus on certain objects while maintaining a beautiful blur of the backdrop. It is essential to comprehend how aperture settings affect depth of field to get the appropriate visual effect. The bigger negative size of the format adds a unique appearance to photos by facilitating a smoother bokeh.
Managing Focus and Sharpness:
Achieving sharpness across the frame is essential in medium-format photography. The increased resolution of the “6×7” format demands precise focus to capture fine details effectively. Techniques such as manual focusing and utilizing the camera’s depth of field preview function enhance control over focus and contribute to the overall image quality.
Experimenting with Film Stocks:
Film selection plays a significant role in shaping the final look of “6×7” images. Photographers often experiment with different film stocks to achieve specific color renditions, contrasts, and grain structures. Understanding the characteristics of various films allows for creative expression and personalization of photographic style.
Post-Processing Considerations:
While film development is an important art form, digital image correction also involves post-processing. When working in the “6×7” size, photographers can experiment with methods like selective retouching, contrast changes, and color correction to improve the final product while maintaining the true characteristics of medium format photography.
Continuous Learning and Experimentation:
Mastery in “6×7” photography is an ongoing journey of learning and experimentation. Photographers should embrace the process of continual improvement, staying curious, and exploring new techniques. Experimenting with different approaches, compositions, and styles contributes to personal growth and the development of a distinct photographic voice.
Conclusion
In conclusion, the study of “6×7” photography has uncovered a diverse range of medium format photographic creativity, craftsmanship, and creative expression. Every element adds to the particular appeal of this format, from the characteristic appearance of portraiture to the painstaking process of film preparation.
Photographers who want to learn the nuances of “6×7” photography might use the technical insights offered as a guide. With this chapter concluding, photographers are still welcome to go on new adventures, embrace lifelong learning, try out novel approaches, and produce photographs that go beyond the usual. As a tribute to the continuing allure and enduring wonder of the skill of capturing moments via the lens, “6×7” photography’s legacy endures.


Congratulations, you’re engaged! Now comes the thrilling, and sometimes daunting, task of planning your special day. Among the long list of essential vendors, there’s one hire you’ll treasure forever – your wedding photographer. From candid emotional moments to glamorous poses, capturing stunning wedding photos in TN ensures your memories are beautifully preserved for generations to come.
This comprehensive guide is here to help you discover the best wedding photographers in Tennessee, what to look for in a professional, tips for an unforgettable wedding album, and everything in between.
Why Tennessee is a Dream Wedding Destination
From the Blue Ridge Mountains in the east to the lively streets of Nashville, Tennessee offers picturesque backdrops for every type of wedding. Whether you’re planning a charming southern barn wedding, a glamorous city affair, or an intimate elopement, the state delivers a vibrant tapestry of options that wedding photographers adore.
Areas like the Great Smoky Mountains National Park provide breathtaking natural scenery, while historic venues in cities like Chattanooga and Memphis offer timeless charm. No matter which corner of Tennessee you choose for your big day, the right photographer will capture the genuine magic of this beautiful state.
What Sets Tennessee Wedding Photographers Apart?
Wedding photographers in Tennessee stand out for a variety of reasons. Their local expertise, technical skill, and ability to blend into the wedding day give them an edge that keeps couples raving. Here are a few ways they excel:
1. Local Knowledge
Hiring a Tennessee-based photographer means tapping into their understanding of the state’s hidden gems. Whether it’s the perfect golden-hour spot in Franklin or a little-known rustic barn south of Knoxville, their insight can elevate your photos.
2. Experience with Unique Weather & Lighting
Tennessee weather can be unpredictable, with sunny mornings leading to dramatic thunderstorms by afternoon. Experienced photographers know how to adapt quickly and use natural lighting beautifully, whether it’s a cloudy mist over the mountains or the vibrant glow of a sunset in rural farmland.
3. A Natural Focus on Storytelling
Tennessee photographers masterfully weave your love story into the images they capture. From candid moments of laughter on the dance floor to perfectly posed shots with your bridal party, they ensure that every frame illustrates the emotion and connection of your big day.
How to Choose the Right Wedding Photographer in Tennessee
Now that you know why wedding photographers in Tennessee excel, it’s time to find the one that’s perfect for you. Here are some steps to make the selection process easier.
1. Research and Gather Recommendations
Search Wedding Photographers Tennessee online and browse directories like The Knot or WeddingWire. Make a list of photographers whose portfolios you admire. Ask friends who recently got married for recommendations, especially if you were impressed by their wedding photos.
2. Explore Their Portfolio
Tennessee weddings can range from rustic farmhouse celebrations to black-tie downtown events. Be sure to explore photographers’ online galleries to see if their style aligns with your wedding vision. Look for diversity in their portfolio – not just posed shots, but moments full of authenticity, laughter, and tears.
3. Meet in Person or Virtually
Scheduling a consultation is vital. This is a chance to connect, discuss your wedding day plans, and learn how they approach their work. Your photographer should feel like an ally who truly understands your style and vision.
4. Understand Their Packages
Discuss details about pricing, amount of coverage (hours and locations), photo editing, delivery timelines, and any extras like hardcover photo books. Review contracts carefully before making final commitments.
Key Locations for Wedding Photos in Tennessee
To inspire your search and create the ultimate wedding album, here are some incredible spots in Tennessee loved by photographers and couples alike.
1. Great Smoky Mountains
For nature lovers, the Smokies provide awe-inspiring views, winding trails, and lush greenery, perfect for a serene yet majestic backdrop.
2. Cheekwood Estate & Gardens (Nashville)
This elegant botanical garden and historic mansion allow for stunning shots amid vibrant flowers and classic architecture.
3. Lookout Mountain (Chattanooga)
Overlooking incredible panoramic vistas, Lookout Mountain and its nearby venues like Rock City ensure magical photos.
4. Belle Meade Historic Site (Nashville)
With its Southern-style architecture and sprawling grounds, Belle Meade offers timeless charm for both large and intimate weddings.
5. Sun Studio (Memphis)
For couples with a flair for culture and music, why not capture some unique wedding shots in the iconic Sun Studio? Perfect for that vintage rock-and-roll vibe.
Tips for Getting the Most Out of Your Wedding Photographer
Hiring a great photographer is only the first step. Here’s what you can do to ensure your wedding day photography is a dream come true.
- Communication is Key: Share a detailed timeline with your photographer and provide clear instructions about the most important moments (e.g., exchanging vows, first dance, family portraits).
- Create a Shot List: Ensure no key moments or VIPs are missed by preparing a checklist of must-have photos.
- Do an Engagement Shoot: Tennessee photographers often offer engagement sessions. This is an excellent way to get comfortable in front of the camera and develop a rapport with your photographer.
- Plan Around Lighting: Golden hour (the hour before sunset) provides warm, dreamy lighting perfect for romantic portraits. Discuss the lighting schedule with your photographer for optimal shots.
- Relax and Be Present: Authentic wedding photos come from genuine emotions. Focus on enjoying your day while trusting your photographer to capture the magic.
Your Perfect Tennessee Wedding Album is Within Reach
Your wedding photos are one of the few things from your big day that will last a lifetime. With Tennessee offering incredible backdrops and an amazing pool of talented photographers to choose from, you’re on your way to creating cherished memories you’ll love revisiting.
Feeling inspired? Begin your search for the perfect Wedding Photographer in TN today and take the first step toward capturing the essence of your special day.
Need more tips or assistance planning your wedding? Browse our blog for resources and connect with vendors that match your style!

Photography is more than pressing a button; it’s about telling stories, capturing raw emotions, and freezing moments in time. Whether it’s your wedding day, a dreamy engagement session, or simply celebrating your life’s milestones, finding a skilled photographer in San Luis Obispo is key to preserving those special memories.
This blog will help you discover why San Luis Obispo is a haven for photographers, what to look for when choosing the right one, and how to ensure your vision aligns with theirs.
Why Choose San Luis Obispo Photographers?
San Luis Obispo, often called the “Happiest City in America,” boasts breathtaking landscapes, golden coastlines, lush vineyards, and charming downtown streets. Naturally, these scenic backdrops create endless possibilities for jaw-dropping photos that merge artistry with nature’s beauty.
Local photographers are deeply familiar with these locations, giving them an edge in utilizing SLO’s landscapes to their full potential. They know how to capture the glowing sunsets over Pismo Beach, the rolling hills of Edna Valley, and the quaint charm of Mission San Luis Obispo de Tolosa.
Whether you’re planning a big event or a casual portrait session, working with a photographer rooted in San Luis Obispo ensures both stunning visuals and a seamless experience.
Tips to Find the Best Photographer in San Luis Obispo
Choosing the right photographer requires some research and effort. Here’s how to find a professional who perfectly matches your needs.
1. Define Your Photography Goals
To start, be clear about what you’re looking for. Do you need someone to shoot a romantic wedding on a winery, a family photo at Avila Beach, or editorial-quality portraits? Knowing your goals will make it easier to identify photographers who specialize in the specific style or event you’re planning.
2. Check Their Portfolio
A photographer’s portfolio gives you a glimpse into their style, technical abilities, and artistic vision. Look for consistency, attention to detail, and how their photos make you feel.
For example, do their wedding photos radiate love and emotion? Are their portrait shots natural and expressive? A portfolio can reveal if their style fits your preferences, whether you prefer light and airy aesthetics or dramatic, moody tones.
3. Location Knowledge is Key
The San Luis Obispo photographers should know the ins and outs of popular (and hidden) photo locations. Here are some iconic spots you might want captured in your session:
- Montaña de Oro State Park – Rugged coastal cliffs and mesmerizing sunsets.
- Edna Valley Vineyards – Rolling vineyards highlighted by golden-hour light.
- Avila Beach Pier – Coastal charm with stunning ocean views.
- Bishop Peak – Natural beauty for adventurous photo shoots.
Their familiarity with lighting patterns, weather conditions, and ideal compositions for each location adds a professional touch to your imagery.
4. Read Reviews and Testimonials
Reviews from past clients can give you valuable insight into a photographer’s work ethic, professionalism, and personality. Check platforms such as Google, Yelp, and their social media profiles. Pay attention to the recurring themes in reviews – do clients mention punctuality, creativity, or their ability to make them feel comfortable?
5. Ask About Their Process
Every photographer has their preferred way of doing things. Before you commit, consider discussing these essential points:
- Availability: Are they available during your preferred dates?
- Packages: What’s included, and are there add-ons like extra hours or photo albums?
- Editing Style: Will they edit your photos according to your aesthetic preferences?
- Turnaround Time: How long will it take to receive your final edited images?
6. Make Sure Personalities Click
Your photographer is more than just someone pressing “capture” behind the lens – they’re part of your big day or intimate moment. Feeling comfortable with them is essential, as it directly impacts the naturalness of your photos. Schedule a call, Zoom session, or in-person consultation to chat about your vision and see if your personalities align.
Popular Photography Styles in San Luis Obispo
Knowing photography styles helps you communicate your vision clearly. Here are a few popular options to consider, particularly in San Luis Obispo’s photogenic settings.
Wedding Photography
Whether you’re exchanging vows in a vineyard, by the beach, or in a rustic barn, most SLO photographers specialize in weddings. Opt for a photographer skilled at capturing not just the big moments but also the smaller, more candid ones—from the shy smiles to the teary-eyed toasts.
Portrait Photography
Perfect for professional headshots, family portraits, or senior photos, portrait photography emphasizes creating artful compositions that highlight individual personalities.
Lifestyle Photography
Lifestyle shoots are casual, intimate, and storytelling-focused. Whether it’s a family outing at Shell Beach or you and your partner savoring coffee downtown, SLO’s rich environments pair beautifully with this style.
Drone Photography
Want a bird’s-eye view of your wedding venue or event? Some photographers in SLO incorporate drone technology to capture breathtaking aerial perspectives, adding a cinematic flair to your gallery.
Why Supporting Local Photographers Matters
When you hire a photographer in San Luis Obispo, you’re doing more than booking a service. You’re supporting local businesses and creative individuals who pour time and passion into their craft. Many of these photographers also collaborate with local vendors like florists, event planners, and venues, helping to create a seamless network for your events.
Additionally, local photographers often prioritize sustainability by using eco-friendly printing methods and promoting outdoor shoots that celebrate SLO’s pristine nature.
Key Questions to Ask Before Hiring
To finalize your decision, don’t hesitate to ask these critical questions when interviewing potential photographers:
- Have you worked at the specific venue/location before?
- What gear do you use, and do you have backup equipment?
- Are you insured?
- Can you provide full galleries of past work?
- Do you offer customizable packages to fit my budget?
These questions will help you ensure you’re making an informed choice and setting the stage for a successful collaboration.
Make Your Memories Unforgettable
Hiring a photographer in San Luis Obispo is an important step toward preserving life’s special moments. By taking the time to research, review portfolios, and communicate your vision, you’ll ensure your experience is as enjoyable as the photographs that follow.
Not sure where to start? Whether you’re looking for timeless wedding photos or an artistic portrait session, SLO’s talented photographers are ready to turn your dream photos into reality.

For many photography enthusiasts, shooting on 35mm film offers a nostalgic, tactile experience that digital can’t replicate. Whether you’re a professional photographer or simply dabbling in analog, one essential step in your film photography process is finding the right film-developing lab. The quality of your final images depends heavily on this step, so selecting the right laboratory is key.
This guide will provide all the insights you need about the 35mm film developing lab, from understanding the process to identifying the best lab for your needs.
Why Choose 35mm Film?
Before we explore the labs, let’s talk about why photographers still gravitate toward 35mm film today. Despite the prevalence of high-tech digital cameras, the film has its own charm and benefits.
- Dynamic Range and Unique Colors: 35mm film produces images with rich color tones and a dynamic range that many argue digital cameras can’t quite replicate. It portrays light, shadow, and texture differently, giving photos an organic feel.
- A Slower, More Intentional Process: Film photography forces you to slow down and consider each shot. With limited exposures per roll, every frame counts.
- Timeless Aesthetic: Whether it’s the natural grain, the way it handles highlights or the depth and warmth it brings to an image, the film offers a timeless, unmatched aesthetic.
The 35mm Film Developing Process
Developing 35mm film is a detailed procedure that transforms your exposed roll into negatives or finished prints. Here’s a simplified breakdown of the process most labs use to develop film, which can also help you understand what to expect.
Step 1: Film Development
The shot film is exposed to chemicals to make the latent image visible. Most labs process 35mm film using one of the following techniques:
- C-41 for Color Film: This is the standard process for color negative film, used in widely available brands like Kodak Gold or Fuji Superia.
- Black and White Development: Black-and-white rolls require different chemicals to develop them properly. This process highlights contrasts and details in your photos.
- E-6 for Slide Film (Reversal): A rarer but stunning process, E-6 develops slide or transparency film, delivering positive images instead of negatives.
Step 2: Drying and Scanning
After the chemical bath, the negatives are carefully rinsed, dried, and often digitized. High-quality labs use professional-grade scanning equipment to ensure your photos retain sharpness and accurate colors.
Step 3: Printing (Optional)
For those who want physical prints, labs can print your scanned files or negatives on high-grade photographic paper. The quality of prints depends on the lab’s expertise, equipment, and materials used.
Key Features of a Great Film Developing Lab
Not all film-developing labs are created equal. When looking for the perfect lab, consider the following factors to ensure your photos are handled carefully and meet your expectations.
1. Expertise
Experience counts when dealing with analog film. Look for labs with seasoned technicians or photographers who understand the intricacies of 35mm film and know how to handle it under different circumstances.
2. High-Quality Scanning Services
If you plan to digitize your photos, choose a lab with advanced scanning hardware with high resolution and color accuracy. Low-quality scans can dull or distort your images, defeating the purpose of shooting on film in the first place.
3. Chemical Maintenance
One critical aspect often overlooked is how well the lab maintains its chemicals. Labs that frequently refresh their chemicals deliver sharper, cleaner results, free from unwanted streaks or smudges.
4. Variety of Film Types Supported
Not all labs can process every film type. Ensure the lab specializes in the type of film you’re using, be it black-and-white, C-41 color, or slide (E-6).
5. Community and Reviews
If you’re unsure about a lab, check out reviews online or ask in film photography forums. Labs that are well-loved by the community often deliver consistent, exceptional results.
Popular 35mm Film-Developing Labs
Looking to send off your rolls? These renowned labs are celebrated for their great customer service, precision, and quality results.
1. The Darkroom (USA)
This California-based lab accepts film of all types and delivers remarkable results. They offer high-resolution scans and even an easy-to-use online gallery to view your photos.
2. Richard Photo Lab (USA)
Loved by professional photographers, Richard Photo Lab specializes in premium services, offering tailored film developing and color correction.
3. UK Film Lab (UK)
The UK Film Laboratories provides exceptional scanning and custom-developed presets for European photographers. They’re known for their detailed attention to each role they process.
4. Prolabs Barcelona (Spain)
Handling everything from black-and-white rolls to E-6, Prolabs Barcelona is a go-to choice in Europe for consistent results.
5. Hillvale (Australia)
An Australian favorite, Hillvale offers reliable service and caters specifically to film enthusiasts who love color accuracy and character.
Tips for Getting the Most out of Your Film Developing
To ensure you get optimal results from your chosen lab, follow these tips when sending in your 35mm rolls.
- Label and Organize: Label your rolls and include specific instructions, such as push/pull processing. This ensures the lab handles them correctly.
- Protect Your Film: When shipping film, protect it with bubble wrap and avoid exposing it to extreme temperatures during transit.
- Specify Scan Preferences: If you prefer specific resolutions or file formats, inform the lab beforehand to avoid surprises.
- Be Patient: Quality labs may require extra time due to the care involved in developing film. It’s worth the wait for excellent results.
Why a Film Community Makes All the Difference
Film photography is as much about the process as it is about the photos. By using a dedicated lab, you’re not just getting high-quality results—you’re tapping into a community of artisans and enthusiasts who share your passion.
Many of the best labs actively support the film photography community through workshops, online educational content, and collaborations with artists. Engaging with these communities can provide inspiration and help you refine your craft.
Bring Your Analog Vision to Life
Finding the right 35mm film-developing lab is essential to the analog workflow. From professional setups to small, community-driven operations, the best labs provide more than just photo development—they deliver an experience.
Whether you’re preparing for an exhibition or developing rolls from your family vacation, you want to ensure your film is in good hands. Choose a trusted lab, experiment with new techniques, and enjoy the artistry that film photography continues to offer.

Why Choose Leadburst Digital as Your Lead Generation Agency?

Catch-Up TV and Replay on IPTV Smarters Pro: How to Watch Missed French Programmes in 2026

M3U vs Xtream Codes API: Which IPTV Connection Method Works Better for French Subscribers?

Quelle Application IPTV Choisir pour sa Smart TV en France : Comparatif 2026

Why Smaller Teams Are Outperforming Larger Organizations: Sabeer Nelli Explains the Shift

Modern Interior Design Services in Bangkok: Transform Your Space Today

TiviMate Catch-Up TV: How Terugkijken Works for Belgian and Dutch Viewers (And When It Does Not)

Paying for IPTV in the Netherlands: iDEAL, Cancellation Rights, and What Your Provider Owes You
How to Watch Dutch and Belgian TV During Your Vacation (Without a VPN That Half-Works)
IPTV for Dutch Families: Children’s Channels, Parental Controls, and What Parents Actually Need to Know
The Dutch Sports Fan’s Television Problem (And Why IPTV Is the Only Honest Answer)

How IPTV is Transforming Home Entertainment Across the Netherlands: A Complete Practical Guide for Dutch Viewers in 2026
The Dutch Viewer’s Complete Guide to IPTV: What It Is, How It Works, What You Can Watch, and What to Expect Before You Start

Vograce Acrylic Stands – Perfect for Merch & Promotions
Can Switching to IPTV Help French Households Reduce Their Monthly Bills?
Is Trading Is The Best Investment Option After Retirement?

The Ultimate Guide to 35mm Film Developing Lab

10 Things to Do in Punta Mita

Save on Campervan Rentals with a roadsurfer Gutscheincode

Best Things to Do in New York City – Ultimate Travel Guide

Explore New Real Estate Programs in Marrakech

Tailored Tours to Switzerland | Private & VVIP Experiences

Why is there a white spot on my laptop screen?

How to Be the Best Real Estate Agent Murfreesboro

Find the Best Real Estate Agents Main Line
6×7

Guide to Buying Testosterone Propionate Safely and Effectively

Throne Of Seal Insert E108 Pan Xiuyu
Shana Roberts Northbrook | Discover Her Story

Effective Property Management in Marrakech Morocco
-

 Gaming7 months ago
Gaming News: The Ever-Evolving World of Video Games in 2025
-

 Health5 months ago
Expert Eye Care in the Southern Suburbs: Your Guide to Finding a Premier Optometrist in Tokai
-

 Health5 months ago
Vision Excellence on the West Coast: Your Guide to Finding a Top Optometrist in Milnerton
-

 News5 months ago
Heathridge Partners Tokyo Japan on the Value of Wealth Simplicity in a Complex World
-

 Home Improvement5 months ago
Roofing Services in Orem: Trusted Orem Roof Company for Lasting Protection
-

 Travel5 months ago
Discover with a Leading Morocco Travel Company
-

 Entertainment5 months ago
Can Switching to IPTV Help Dutch Households Reduce Their Media Costs?
-
 Technology4 months ago
The Dutch Viewer’s Complete Guide to IPTV: What It Is, How It Works, What You Can Watch, and What to Expect Before You Start